<!--heroUrl https://img.glmimage.app/uploads/blog/ecommerce-requirements-hero-1789656210299.webp-->
AI model try-on — virtual fitting — puts your actual garment on a generated model: the fabric drapes over real shoulders, the print follows the torso, the size looks like what a human wears. For small apparel brands it solves the problem that used to require a casting budget: showing every SKU on believable bodies without booking models for each drop. This guide covers how the technique works, what it replaces cost-wise, what makes a try-on image believable (and what shatters it), and a practical workflow from garment photo to on-body set — including the honest limits you should know before using it on a live listing.
Key Takeaways
- AI model try-on = generated model wearing your real garment, locked to the reference photo's fabric, print, and cut.
- It replaces per-SKU model shoots: no casting, no fitting sessions, no reshoots when sizes change.
- Believability lives in four details: fabric fall, print alignment, contact shadows at the waist and shoulders, and consistent lighting between body and garment.
- Body diversity is the quiet superpower — the same SKU on several body types answers the #1 pre-purchase question apparel buyers have.
- Keep claims honest: try-on images must represent the real garment faithfully; marketplaces and customers both punish lookalikes.
- One garment photo (flat or ghost mannequin) plus a model brief is enough to generate a full on-body set.
What AI Model Try-On Actually Is
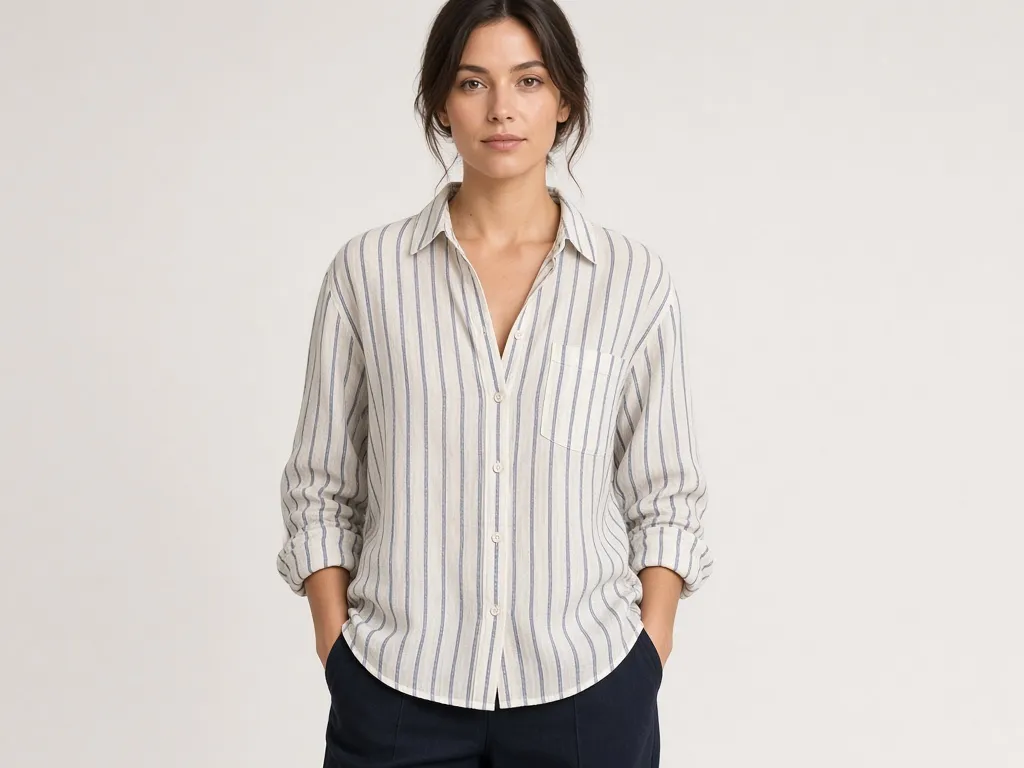
The technique sits between two older ideas. Traditional model photography gives you a real person wearing the real garment — perfect fidelity, high cost, scheduling pain. Early "virtual try-on" apps overlaid flat garments on static bodies — cheap, and looked it. Current AI try-on is different: a generation model receives your garment photo as a hard reference and a model description, then renders the garment worn — the model's pose, body, and lighting are generated; the garment itself stays locked to what you uploaded.
The result reads as on-body photography because the model succeeds at the hard parts: fabric fall across the chest, sleeve drape, hem behavior, and the small distortions a print undergoes over body curvature. When it fails, it fails at the same places — and knowing those failure modes is what separates usable try-on sets from uncanny ones.
What Virtual Fitting Replaces
A per-SKU photoshoot budget has four line items, and try-on attacks all of them:
| Cost | Traditional shoot | AI try-on |
|---|---|---|
| Model fees & casting | Per half-day, per model | None — generated bodies |
| Styling & fitting | Pins, clips, steam, time | Garment photo as-is |
| Reshoots (size/fit updates) | Book the model again | Re-generate in minutes |
| Body-type coverage | One or two models | Several bodies per SKU |
The honest accounting: high-end brand campaigns still want human photography — the art direction and imperfection are the point. Where try-on wins decisively is catalog coverage: 60 SKUs × 3 body types × front/back = 360 images that no small brand will ever shoot, but can generate.
The Anatomy of a Believable Try-On Image
Four details decide whether a viewer's brain tags the image "photo" or "off":
- Fabric fall. A stiff denim and a silk blouse fall differently over the same shoulders. The generated garment must inherit the reference's weight — check the shoulder line and the hem.
- Print and pattern alignment. Stripes and plaids must follow the body's curvature, breaking at seams the way real fabric does. A print that slides across the torso like a sticker is the #1 tell.
- Contact shadows. Where the garment meets the body — waistband, shoulder seam, under the bust — soft compression shadows must appear. Their absence floats the garment.
- Light unity. One light story shared by model and garment. A warm-lit body with a cool-lit shirt reads as collage immediately.
Zoom into those four on every generated frame before it ships; they're cheaper to check than returns are to process.
Body Diversity: The Quiet Superpower
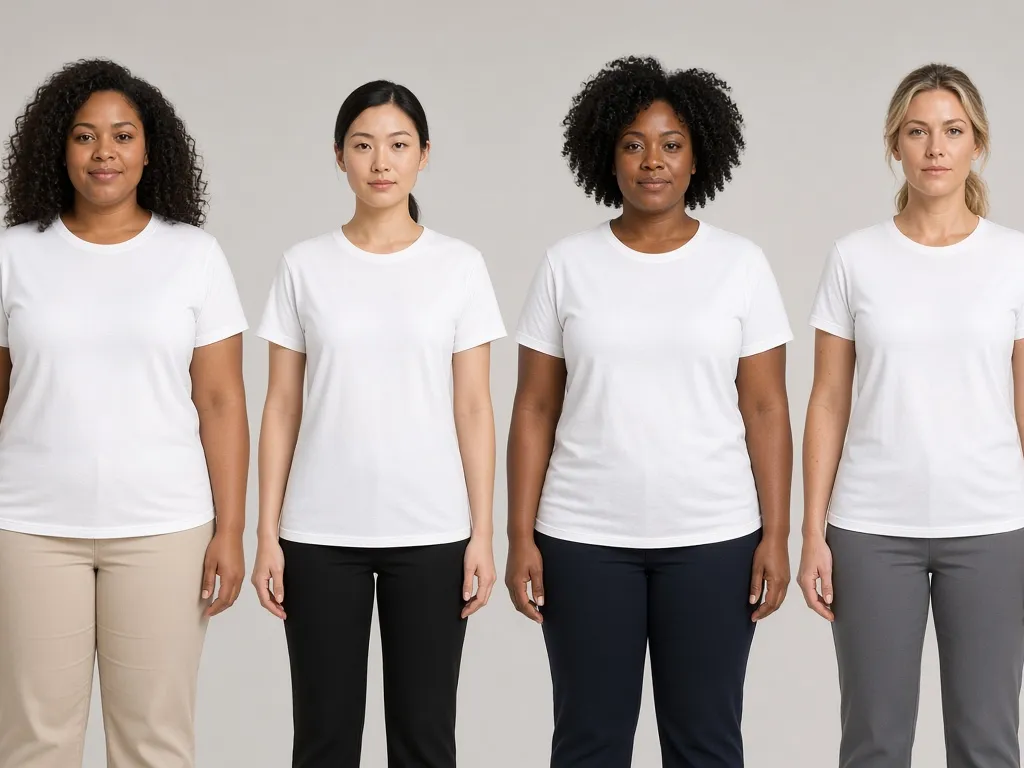
"Will this fit me?" is the question that kills apparel conversion and drives two-thirds of returns. Try-on sets answer it with coverage: the same SKU shown on a range of heights, builds, and skin tones. Three body variants per SKU is a workable floor; five is a catalog advantage no traditional shoot budget reaches.
Two practical rules: keep the pose and lighting constant across body variants so differences read as body, not photography; and pick body descriptions that match your actual customer base rather than a single aspirational type — the data on returns pays for the honesty.
The Workflow: Garment Photo to On-Body Set
TRY-ON SET, garment locked:
1. Reference: one garment photo — flat-lay, hanger, or ghost
   mannequin shot; true color, whole garment in frame
2. Model brief per variant:
   - body: height/build descriptors (e.g., 175cm slim, 165cm mid)
   - pose: neutral front-facing, arms relaxed
   - skin tone & hair: vary across the set
   - setting: seamless neutral studio, soft even light
3. Generation constraints:
   - garment locked to reference (fabric, print, cut, color)
   - natural fall and contact shadows
   - no text overlays; keep the neckline and hem exact
4. QC: four anatomy checks above, then export
   front/back per body variant, square 2000px
Run this per drop: one reference per SKU, the same model brief across the drop for consistency. The E-commerce Studio's try-on card runs garment-locked generation with these constraints baked in — upload, pick body variants, export the set. Try AI model try-on in the E-commerce Studio →
Honest Limits and How to Stay Safe
- Fit is rendered, not measured. Try-on shows how the garment looks worn, not exact grade rules — keep your size chart authoritative and link it near the images.
- Represent the real SKU. Generation must stay locked to your garment photo. A "prettier" invented version of the product is misrepresentation, and marketplaces treat it that way.
- Watch the uncanny zone. Hands and complex poses are where generation still stumbles; neutral poses with relaxed hands dodge most of it.
- Label internally. Keep generation metadata with each image so a later compliance question has an answer trail.
Frequently Asked Questions
What is AI model try-on?
Generating a model wearing your actual garment — the garment is locked to your reference photo, while the body, pose, and lighting are generated around it.
Do customers accept AI try-on images?
Acceptance tracks believability. Garment-locked images with correct fabric fall and shadows perform like photography; sticker-like overlays get flagged and ignored.
How many body types should I show?
Three per SKU as a floor, five for catalog advantage — constant pose and lighting so the difference reads as body, not shoot.
Can I use try-on images on marketplaces?
Yes, in additional-image slots and for most main images where lifestyle presentation is allowed — provided the garment is represented faithfully. Check each marketplace's apparel style guide.
What's the best reference photo for try-on?
A flat-lay or ghost mannequin shot, true to color, whole garment visible, minimal wrinkles — the generation handles the body; the reference must nail the garment.
Sources
- Marketplace apparel imagery guidance (Amazon Seller Central style-guide family; eBay picture policy)
- GLMImage E-commerce Studio try-on card documentation
- Apparel returns and fit-uncertainty patterns in e-commerce literature (see size-chart guidance)
Related: ghost mannequin photography with AI →, lifestyle product photography scenes that sell →, and marketplace image requirements in full →.